Most clothing brands don’t fail because the designs were bad. They fail because the founder ordered 500 units of a product nobody had tested, priced it wrong, or discovered after the goods landed that the labeling didn’t meet the destination market’s rules.
This guide walks through the twelve steps of how to start a clothing brand — in the order you should actually do them — and covers what determines whether a first collection launches cleanly. It’s written for founders building a brand with a manufacturing partner rather than a factory of their own, which is the realistic path for the vast majority of new labels.
How to Start a Clothing Brand: The 12-Step Short Version
If you only want the checklist: pick one niche, validate demand with real purchases, build a tech pack, choose a low MOQ manufacturer, sample properly, get compliance right, and launch with three styles. The rest of this guide expands each step in order — because the detail is where new brands lose money.
Step 1: Define the niche before you design anything
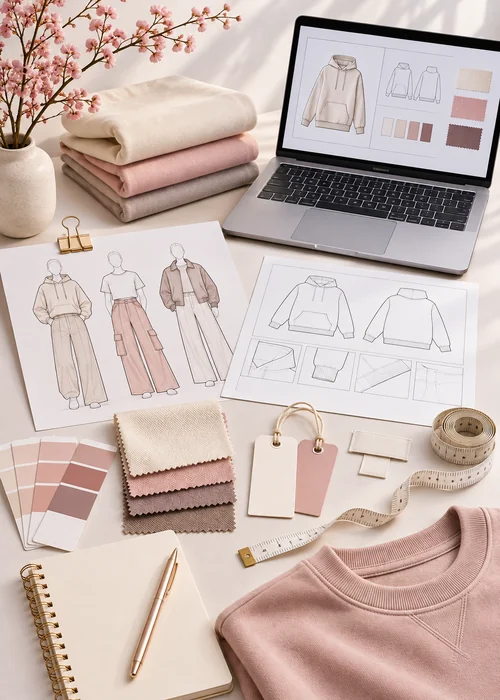
“Women’s clothing” is not a niche. It’s a category. A niche is a specific customer in a specific situation: linen workwear for women in hot climates, adaptive tops for wheelchair users, matching pet-and-owner accessories for boutique gift shops.
A tight niche does three things at once:
- It narrows your fabric and silhouette choices, which lowers sampling cost and development time.
- It gives you a visual language competitors can’t easily copy.
- It makes paid acquisition cheaper, because your creative speaks to one person instead of everyone.
Write a one-sentence positioning statement and keep it on your desk: “For [customer] who [situation], we make [product] that [differentiator], unlike [alternative].”
Step 2: Validate demand before you spend money
You need evidence that people pay for this, not that they say it’s a nice idea. Three cheap validation routes:
- Pre-launch landing page. One product page, real photos or high-fidelity mockups, an email capture field, $150–300 in ads. A 3–5% email conversion rate on cold traffic is a healthy signal.
- Competitor gap analysis. List ten brands selling something adjacent. Note what customers complain about in reviews — sizing inconsistency, scratchy fabrics, poor communication. Those complaints are your product brief.
- Small-batch market test. Sell 20–30 units through a local market, Instagram, or a pre-order campaign before committing to a full production run.
Step 3: Build the brand basics
You don’t need a $15,000 identity package. You do need:
- A name that’s clearable as a trademark in your target markets
- A logo that works at 16px (favicon) and on a woven label
- Two or three typefaces and a defined color palette
- A photography direction — the visual rules that make your feed look like one brand
Register the trademark early. Rebranding after you’ve printed 2,000 labels, polybags and hangtags is one of the most avoidable costs in this business.
Step 4: Turn ideas into a tech pack
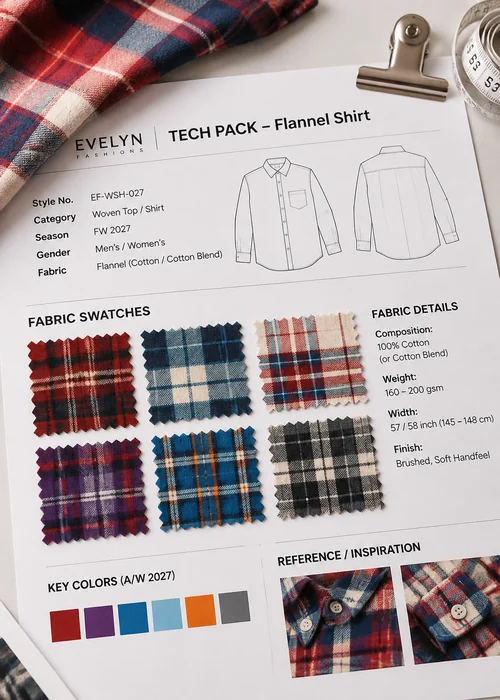
A tech pack is the document a factory quotes and produces from. If you skip it, you’ll get inconsistent samples and a price you can’t verify. A usable tech pack contains:
- Flat sketches — front, back, and detail views, with measurements called out
- Bill of materials (BOM) — every fabric, trim, thread, label, and interlining, with supplier or specification
- Measurement spec sheet — points of measure (POM) with tolerances, usually ±0.5 cm on knits and ±0.3 cm on wovens
- Construction details — seam types, stitch density (stitches per inch), hem and finish
- Colorways — with Pantone TCX references, not screenshots
- Artwork files — vector or 300 dpi, with placement dimensions and print method
- Labels and packaging — care label wording, country of origin, hangtag placement
If you can’t produce this yourself, most full-service manufacturing partners will develop it with you during the design phase. That collaboration is usually faster than learning Illustrator under deadline.
Step 5: Choose your manufacturing model
There are four realistic options, and they differ enormously in cost, control and speed.
| Model | What it means | Best for | Watch out for |
| Cut-and-sew, domestic | Local factory sews from your pattern | Very small runs, fast iteration, “Made in [country]” positioning | Highest per-unit cost; limited fabric access |
| Private label / blanks | You buy existing styles and add your branding | Testing categories with minimal risk | Low differentiation; competitors sell the same base product |
| Full-package overseas | Factory sources fabric, develops, produces, packs | Brands scaling past ~100 units per style | Longer lead times; you must vet capability carefully |
| Trading company | Intermediary manages multiple factories | Complex multi-product collections | Less visibility into who actually makes your goods |
Most guides on how to start a clothing brand push one of two routes: domestic cut-and-sew or overseas full-package production. For most new brands, full-package overseas with a low MOQ partner offers the best balance: real customization, factory-direct pricing, and enough flexibility to run a small first collection.
Step 6: Vet the manufacturer properly
Price is the last thing to compare, not the first. Ask every candidate the same eight questions and score the answers:
- What exactly is your MOQ — per style, per color, or per fabric? A “100 piece MOQ” that means 100 per colorway across four colors is a 400-piece order.
- Is the sampling fee refundable against bulk production? Good partners credit it back.
- Do you source fabric in-house, and what’s the fabric MOQ? This is where small orders usually break down.
- What are your sampling and production lead times, in writing?
- Are you the factory or a trading company? Both are legitimate; you just need to know which.
- What does your QC process look like? Look for in-line checks, a final AQL 2.5 inspection, and a pre-shipment report with photos.
- Which audits and certifications do you hold? BSCI, SEDEX/SMETA, OEKO-TEX, GOTS — and ask for the current report, not a logo on a website.
- How do you handle defects and rework? Get the remedy in the contract, not in a WeChat message.
Also ask for two references from brands similar to yours in size and category. Then actually contact them.
Step 7: Understand the sampling stages
Sampling isn’t one step, and treating it as one is how timelines slip.
- Proto sample — proves the concept and construction. Expect it to be rough.
- Fit sample — checked on a live model or dress form; you adjust the spec sheet here.
- Size set — one sample per size grade, to confirm grading is correct.
- PP (pre-production) sample — made with production fabric and trims. This is the sample you sign off and keep as the reference standard.
- TOP (top of production) sample — pulled from the actual run and compared against the approved PP.
Budget 3–6 weeks for sampling on a first collection. Rush it and you’ll pay for it in rework.
Step 8: Do the MOQ math before you commit
Low MOQ is not cheap MOQ. Per-unit cost typically drops 15–30% when you move from 100 to 500 units per style, because setup, fabric minimums, and cutting costs get absorbed.
Work out your break-even before you order: Landed cost per unit = (FOB price × quantity + freight + duties + inspection + inbound freight) ÷ quantity
Then check that your planned retail price gives you at least a 4× markup on landed cost for wholesale, or 2.5–3× for direct-to-consumer after ad spend. If the math doesn’t work at 100 units, either raise the price, simplify the product, or start with fewer styles rather than fewer units.
Step 9: Price and plan the collection
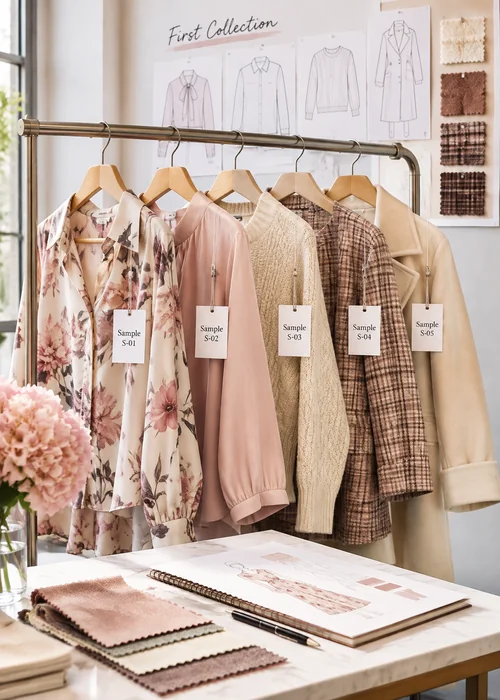
New brands almost always launch with too many styles. Three to five well-developed products that photograph well and share fabrics will outperform twelve unrelated pieces. Shared fabric also reduces your effective fabric MOQ and simplifies production.
Price in three tiers if you plan to sell wholesale later: your DTC price, your wholesale price (typically 50% of retail), and your floor. Never launch at a discount you can’t sustain.
Step 10: Get compliance and labeling right
This is where cheap advice gets expensive. Requirements vary by market and product, but the recurring items are:
- Fiber content and care labeling — mandatory in the US (FTC Textile Rules) and effectively required across the EU
- Country of origin marking — required for US imports
- Chemical compliance — REACH in the EU; California Proposition 65 for the US market
- Flammability — applies to certain apparel categories in the US
- Substantiation for green claims — “sustainable,” “organic,” and “recycled” are regulated terms in several markets; keep certificates on file
Confirm the exact requirements for your product category and destination with your manufacturer and, for anything ambiguous, a compliance consultant. Ask your supplier which third-party lab tests they can arrange — a partner that already runs these routinely will save you weeks.
Step 11: Plan logistics and landed cost
Decide your Incoterm early. FOB (free on board) is the most common for apparel: the supplier delivers to the port, and you control freight. DDP (delivered duty paid) is simpler but hides cost and reduces your control.
- Sea freight (LCL) — cheapest per unit, 25–40 days door to door; sensible above roughly 1–2 CBM
- Sea freight (FCL) — best rate at volume; typically 20ft or 40ft containers
- Air freight — 5–10 days; reserve for urgent replenishment or high-value lightweight goods
Get your HS/HTS code right before the first shipment. A wrong code means delayed clearance or an unexpected duty bill, and it’s much harder to fix after the fact.
Step 12: Launch, measure, and reorder
Treat launch as a test, not a finish line. Track four numbers weekly: sell-through rate by style, return rate and reason, cost per acquisition, and contribution margin after returns.
The first reorder decision matters more than the launch. Reorder only what sold through above ~60% in 8 weeks, and fix sizing or fabric issues before you double down.
Realistic timeline and budget
Knowing the cost and calendar before you commit is a big part of how to start a clothing brand without running out of money halfway through. These are typical figures for a small first collection:
| Phase | Duration | Typical cost (small brand) |
| Positioning and validation | 2–4 weeks | $300–1,500 |
| Brand identity and trademark | 3–6 weeks | $800–4,000 |
| Tech packs and design | 2–4 weeks | $500–3,000 |
| Sampling | 3–6 weeks | $300–1,200 per style |
| Bulk production | 4–8 weeks | Varies by MOQ and style |
| Shipping | 1–6 weeks | Varies by mode |
| Total to first sale | 4–7 months | $8,000–30,000 |
Five mistakes that cost the most
- Ordering too many styles at too few units each. You lose the fabric MOQ advantage and stretch your attention.
- Skipping the PP sample sign-off. Without a signed reference sample, “not as approved” becomes an argument you can’t win.
- Choosing a supplier on price alone. The cheapest quote usually excludes trims, testing, or packaging.
- Ignoring labeling until the goods are ready. Reprinting labels after production can delay shipment by weeks.
- Launching with no content. Photography and product copy do as much selling as the product page design.
FAQ About How to Start a Clothing Brand
How much does it cost to start a clothing brand? Most founders spend $8,000–30,000 to reach a first sellable collection, with sampling and first production as the largest line items — and that’s the honest answer to how to start a clothing brand on a realistic budget. Starting with three styles at low MOQ keeps you at the lower end.
What is a realistic minimum order quantity for a new brand? 100 pieces per style is a common entry point for full-package manufacturing. Some categories, particularly accessories like scarves and pet items, can go lower because they use less fabric and simpler construction.
How long does it take from idea to first shipment? Four to seven months is realistic: two to four weeks of development, three to six weeks of sampling, four to eight weeks of production, plus shipping.
Do I need a tech pack to get a quote? You’ll get a more accurate quote with one, and you’ll avoid the revisions that come from verbal descriptions. A basic tech pack with sketches, BOM, and measurements is enough to start.
Should I manufacture domestically or overseas? Domestic is faster and easier to control for very small runs. Overseas full-package production becomes more economical past roughly 100 units per style and unlocks a much wider fabric and trim range.
Launching your first collection?
Evelyn supports emerging brands end to end — material sourcing, CAD design, low MOQ manufacturing from 100 pieces per style, in-house QC, and door-to-door delivery. If you’re at the tech pack stage or still deciding on a product mix, we’ll review your concept and tell you what’s realistic.